Tuesday, November 27, 2012

Go with the Filo

Filo pastry is my new fave. There are some fantastic recipes out there - more than just the traditional Filo parcel, which means the dishes are much more interesting to cook and eat! What's more is that it isn't (I don't think) crammed with butter, so it is a much healthier option meaning we can pack the filling with cheese and other goodies with less guilt!

There have been a few standout recipes that we have tried over and over that I thought I would quickly share to inspire!

Jamie's Spinach and Feta pie
Whilst we are still battling against the clock to make this in 30mins, it is a quick, mid week meal option and the acidic sides of cucumber with an olive dressing and tomatoes on a bed of basil dressing really cut through the richness of the creamy feta pie. Jamie has a great technique for cooking the Filo pie on the stove top first and then in the oven which makes it easy to cook and serve.

Moroccan Lamb Pie from BBC Good Food Magazine (couldn't find the recipe online unfortunately)
The filling of this pie is cinnamony and subtly spicy which makes it so tasty. However, even though the filling is great, this pie could really be any stew with Filo scrunched up and spread out on top. It makes a plain pie look pretty sexy and the crispness of the pastry complements the soft stew. It's even on the list for a winter dinner party, especially if we can do individual ones!

Zucchini, Haloumi and Herb tarts
These vegetarian tarts were quick to prepare, semi healthy to eat (except with the extra haloumi I threw on top!) and very pretty to serve in the tray, but a bit difficult to remove! It's a great idea to portion with the filo in little tarts, and sit them together when cooking. I am always trying to find low carb vegetarian options, not needing the obligatory pasta or rice that I feel I need when there's no meat, so this was a great alternative and everyone loved the crunch of the filo with the creamy filling!

As summer comes round the corner, I think I'll be cracking out a few more filo recipes as they are always fantastic with a salad, and the filo is so quick to take out of the freezer and then prepare! Do you have any great filo recipes?

Sunday, November 11, 2012

Eat Drink Blog 2012: My Top 5 Highlights

Last week was the wonderful Eat Drink Blog 2012 Conference in Adelaide organised by a fabulous South Australia based group of bloggers. The bringing together of like minds for a weekend has certainly been one of  the highlights of my blogging career, as it reinspired and energised me to lift my blogging game. Of course, I could walk through the days one by one, but since we'd all be asleep by the time the plane touched down in Adelaide, I thought I'd pick the top 5 learnings to share.

1. Sydney pulled the market short straw
I don't quite know how I've made it to Adelaide on a few occasions but never been to the Adelaide Central Market. It's a bit like Central Station in Sydney, that is, not quite in the centre, but now that I know about it, it will be the centre of my next visits to Adelaide. What happened to Sydney in all of this? We ended up with Paddy's Market, selling cheap souvenirs, while Adelaide has this great hub filled with hundreds of vendors collected under the same roof selling their speciality products at what seemed like reasonable prices, creating a real community feel whilst supporting the farmers and growers.

2. Don't gush
Diane Jacobs, an expert in food writing who has written the food writers/bloggers bible, Will Write for Food, (which I can't wait to get my hands on) was the keynote speaker. As well as many other nuggets, her key advice was: don't gush... It's boring. I guess I knew that already, but do have a tendency to rave about things I love, and it would be very easy for me to gush about the Eat Drink Blog Conference, but I'll keep that in check. When I receive the book I have on order right now, I'll be putting my new found food writing knowledge to the test!

3. Write the recipe ingredients in the order they'll be used
One of the themes running through a variety of presentations was that keeping it simple for readers is the key. Readers and, more importantly, our recipe triers, don't want things to be too complicated, or they'll just go elsewhere. I hadn't really actually thought that people would really be trying my recipes, but in case they are, I'd better make them clear. One of the simplest ways to do that is to list out the recipe ingredients in the order they appear in the recipe. I can put that one into practice straight away!


4. Email subscribers are like gold
Email subscribers are the loyal friends who have requested blog posts straight to their inbox. Instead of having to go seeking through the facebook feed, competing with their friends wedding pics, the next fun event, they have opted to be sent the posts each week to distract them from work, and therefore I might actually get a look in! I had never thought about it like that till Jules from the Stone Soup's presentation. By thinking about what I am wanting my readers to do when they get to my blog, I can hopefully make it a little simpler for readers to engage when they arrive!

5. There really is too much of a good thing
Who says you can't get enough of a good thing? I love food and tasting everything I can! The Eat Drink Blog Conference 2012, however, actually pushed me to the limit! There were so many tasty offerings provided for us to feast upon by the generous sponsors: Breakfast from Red Door Bakery, Lunch from the market producers who came in on their day off to feed us at Adelaide Central Market, Coffee from Breville, A Mexican feast from the Hilton, Chocolate fountains from Providore, cheese from Barossa Cheese Company, cakes from the Cupcake Table to mention a few that I can remember! I think it's clear that I'll not make the grade as a competitive eater, but I had a great time trying!

Thanks again to Lambs Ears and Honey; The Hungry Australian; Eating Adelaide; Travelling in MaryJanes; She Cooks, She Gardens; The Natural Foodie; Playing House for organising a memorable, insightful but also fun weekend! And the South Australian Tourist Board for showcasing their beautiful state!


Sunday, October 28, 2012

Off with a bang(er)!

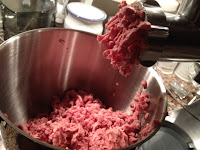
Mincing the lamb and pork belly
My best birthday present ever this year has been on my wishlist ever since I moved out of home! A Kenwood Mixer! Not just any mixer either, this is one of the top of the range models: the Titanium Major. This wasn't a surprise gift, as my hubbie knew he had to involve me in the decision making of what make, model, features and attachments I was hoping for, but what was a surprise was when we put a bid on an online auction for significantly less that we thought it was worth, and WON! I was ecstatic!
Sausage snake

What to cook to "pop the cherry" of the Major, I wondered. It couldn't be any old cake or pavlova that I could have made using my trusty food processor.... It had to be something that we couldn't do before: Sausages!

I've always liked the thought of choosing our own sausage filling, but having seen the sausage making debacles on MasterChef, I wasn't convinced it would be successful first time! Now, I had a mincer and sausage attachment, there was no excuse to give it a go. I figured, worst case, we'd end up with some meat patties!

They look like the real thing!
We wanted to start off with a recipe before we branched out and experimented, so we tried out Poh's Spicy lamb and pork sausage recipe with lots of herbs and spices accompanying the 2 types of meat, that we minced from scratch. The resulting sausages were juicy and tasty, but just a little overcooked (with so much fresh meat in there, the cooking requirements are obviously different to the supermarket bought ones), so we have since fixed that up in subsequent serves, ready for a sausage sizzling summer ahead!

Saturday, October 20, 2012

Anyone for Pimms Jam?

High tea is synonymous for me with 3 tiered cake plates with scones with jam and cream, cucumber sandwiches and other sweet goodies (like the pictures you see in the Sweet Adventure Blog Hop hosted by Le Delicieux) accompanied by a classic English refreshing drink, Pimms! I thought I'd combine a few of these together in my Sweet Adventure creation for this month: Scones with Pimms Jam and cream!

The jam makes way more than you need for the recipe, but it's also good on toast, Victoria Sponge and over ice cream, as it's more runny than store bought varieties. I also made mini bite sized scones to take to work for morning tea, but you can make them as large as you want depending on the cutter you use!

Pimms Jam (Based on a recipe I found on the ITV website)

750g strawberries, hulled
225g cucumber
1kg jam sugar
rind of 1 lemon
rind of 1 orange
juice of 2 lemons
juice of 2 oranges
4 mint leaves
50 ml Pimms

Quarter the cucumbers, remove the seeds and slice into approx 1/4 cm slices;
Simmer in a little water for 10 mins or so, then remove from heat and drain;
Add all the remaining ingredients except Pimms and mint to a large saucepan and leave for 30-45 mins to mascerate;
Add the drained cucumber and bring to the boil for 10 -15 mins, breaking down the whole strawberries as they become tender, to your liking;
Leave jam mixture to cool for 10 -15 mins;
Add Pimms and finely sliced mint leaves and stir well;
Decant into sterilized jars and allow to set in the fridge.

Scones (based on a recipe from the trusty Readers Digest's The Cookery Year)

450g plain flour
pinch of salt
1 teaspoon bicarbonate of soda
2 teaspoons cream of tartar
85g butter
120 ml water
120 ml milk

Preheat oven to 200C;
Sift dry ingredients together in a bowl;
Add butter and either rub in or use a mixer/food processor till the mixture resembles breadcrumbs;
Gradually add milk/water mixed together till it forms an elastic dough – you may not need all the milk/water mix;
Knead on the benchtop till smooth and roll out to approx. 1 cm thick;
Cut with pastry cutters to the desired size;
Lay quite close together on a preheated baking tray;
Brush with left over milk/water mixture;
Bake for 10 mins till risen and golden.

Assembly

Whip 150 ml cream till it forms stiff peaks

To assemble the scones, half each scone and spoon a little jam onto each half and then either pipe or quenelle a small dollup of cream on top! Enjoy with a glass of Pimms or a pot of tea!

Wednesday, October 17, 2012

Happy Birthday to me!


My hubbie always spoils me and this birthday was no exception. In fact, this one was the spoiling of all spoilness. For the first time, instead of going out, he decided he would cook a surprise meal for me at home. I requested a fine dining menu of 3 courses. I did not, however, expect the lengths that he would go to deliver! I was hoping for something just a little bit more than a bowl of pasta. Let's just say if spag bol is a bungalow, my birthday dinner was a high rise!

We started of with a Spanish style tapas dish - Spanish croquettas. These little balls of delicious goo, breaded and deep fried just melted in our mouths setting the stage for the main to come.

From the aromas coming from the kitchen I had a feeling that we were going to be having something smoked. It smelt sweet and spicy, which infused the perfectly cooked duck beautifully. I recognised the dish as one Pete Evans cooked in series 1 of MasterChef and was so impressed by my hubbie's delicious and great looking rendition.

The piece de resistance came for dessert. I was almost expecting a croquenboche from hearing how much time he had spent in the kitchen, but it was quite different. An elegantly plated chocolate tart - also of Masterchef fame! It was Matt Moran's challenge to the series 1 finalists, Poh and Julie, and Cam certainly gave them a run for their money! If birthdays are a time for decadence and richness, this certainly was right on with chocolate ganache lining the plate, a slice of chocolate tart, chocolate mousse quenelles on the plate, chocolate sorbet to cut through the richness and chocolate Macarons for texture.

This was the best birthday treat ever! Three hat dining in my own home!

A little daunting.... What will I come up with for him next year?! Maybe I will need to bring on the croquenboche to top it!

Sunday, October 7, 2012

MasterChef Live

I am the biggest MasterChef stalker groupie fan as you know, so I was so excited to attend MasterChef Live yesterday. It is the best of it's kind with so many cooking demonstrations, in between the exhibitors, we were hopping from stage to stage watching MasterChef contestants past and present sharing tips and tricks they have learnt and learning from the real life Sydney chefs.

I have several new little techniques that I'll try in our kitchen now - deep frying enoki mushrooms seems all the rage with the Season 4 contestants. We love mushrooms, and this little technique to add some crunch to a plate sounds like it will be great for summer entertaining!

Darren Robertson's sherbet is something I'll definitely test out at home. After a meal last year at Ritual where a cardamom sherbet lined the plate, it's been something I'd love to put my own spin on, and now I know how to make it!

Prompted by a fabulous meal at Ms Gs on Friday night, chicken was on my hubbies mind, and a causal conversation with Audra Morris sparked a few ideas for him to try for a fried chicken coating to rival Audra, Mindy and Kylies "3 Pepper Chicken" from their pop up, or Dan Hong's "Naked Chicken" that we loved the other night!

Duck from the Three Blue Ducks
Of course, it wasn't just picking up on techniques for the kitchen. We came home with lots of heavily discounted booty (including pre-sale of MasterChef 2012 winner, Andy's new book "The Next Element" and our bellys full of some amazing food - the highlight for me being the Three Blue Ducks slow roasted duck with Asian greens which fell off the bone and melted in your mouth - a perfect dish for eating with a plastic fork (and I hate eating with plastic cutlery at the best of times!) whilst sheltering from the light drizzle!

Saturday, September 29, 2012

Waterside Inn


Croc at Sunset

Wow! This time last year we were off to Darwin! Our trip to the Northern Territory gave me a different food perspective, not an eating experience, but an interesting insight into some Bush tucker tricks employed by the native indigenous Australians. On our river cruises along crocodile infested water, it was surprising to hear about the variety of foods that were available in the river and on the banks, in addition to the crocs themselves.

Melaleuca Paperbark Trees
After catching the barramundi that are prolific in the Kakadu waters, the Melaleuca, paper bark was used to wrap the fish and give it distinctive flavours. One of the most interesting aspects was that different trees would give off different flavours - thus the indigenous people could have their choice of "seasonings."

Pandanus Tree
There were a few other anecdotes that sparked my interest: Pandanus, another edible waterside offering, provided fruit and leaves to wrap and scent food, as well as weave into baskets. The plentiful lotus flowers and lily pads around the river systems were popular, as seeds and roots could both be eaten.

Lotus
Finally (or rather the last thing that sticks in my brain!), an alternative fishing method was to grind up the mangrove leaves into a poison to float in the water. The stunned fish floated to the surface and the indigenous people could collect them much easier!

As I reflect now a year on, from the comfort of my living room, with my fridge and spice rack a few metres away, and a supermarket across the road, it's fascinating to transport myself to another world where food stuffs come from the earth and ingenious methods are employed to enhance basic meals.

Monday, September 17, 2012

Liqueur Coffee Sauce

When I saw this months hop "Feeling Saucy" hosted by The Kitchen Crusader I leafed through my new Michel Roux "Sauces" for inspiration and whilst not exactly in the book, chose a liqueur coffee sauce. I figured a vanilla pannacotta would be an excellent base for any sauce and thought when I'd come to my final decision that I would create an affogato pannacotta dessert, with the pannacotta instead of the ice cream and quite a runny sauce that would be excellent over ice cream or cake as well as the pannacotta.

Liqueur Coffee Sauce

100ml Golden Syrup
120ml Strong Coffee
50g Butter
100ml Cream
2 tablespoons Kahlua
  • Melt the golden syrup with the coffee;
  • When the syrup has melted, add the butter and stir in until melted and glossy;
  • Add in the cream and reduce slightly on a low heat;
  • Finally add the Kahlua;
  • Drizzle over pannacotta (or ice cream).


Thursday, September 13, 2012

Convenience foodie!

I have been to a few restaurants recently but for some reason today I wasn't inspired to blog about my eating out experiences. I am going to turn to something closer to home. Since we got our iPad about a year ago, we have been managing our weekly menus with an app called Paprika. I haven't been paid or sponsored in any way to write this but is one of the most fabulous apps.

As you may know, I am an avid menu planner. We have more variety and less waste by planning for the week. Up until this year I used a diary to note down our dishes and write the shopping list. Now all I need is the phone and/or the iPad. I can either read through my magazines and add in a note manually which page to go to, or search for recipes an build my virtual recipe collection from many websites where you can save straight into the app with one touch of a button. Ultimate convenience - with the menu designing, not with the food itself!

Sunday, September 2, 2012

Mountain Range

Grilled Chicken Skewers
This weekend we went camping out in the Watagan Mountain Range, to try out a few new purchases of ours. The first was our new Jeep "Nancy," a fun 4WD soft top, which we were keen to try on a quick weekend away to see how much she holds. The second was our new camping stove (or range!) which we'd purchased at the camping show earlier this year but hadn't used it yet. Our previous camping cooking appliance was a fabulous "Fire and Ice" BBQ/Esky combo which served us so well for many years. Last year in Darwin whilst camping though, we experienced the convenience and compactness of the gas camping stoves and decided to upgrade. We got ourselves a fabulous Colemans 3 Burner range.
Veg, potatoes and patties (for the kids)

We are known for our gourmet camping menus and this one was no different. We started off with some honey soy chicken skewers. Normally on the BBQ it would take about 20 mins to warm up and then about 30 mins to cook chicken but these were cooked through in about 15 mins. Our main was sirloin steaks with veg stir fry and potatoes. Again the stove did a great job. We had the grill plate over half for the steaks and used a fry pan for the stir fry on one of the other burners. What a great dinner to christen the stove for many more excursions to come!

Sunday, August 26, 2012

White Chocolate Raspberry Ripple Ice Cream

I had so many ideas flying around in my head for the Sweet Adventures "Berry Nice to Meet You" Blog Hop hosted by the Hungry Australian this month that I was a week late to post - well not just that, but also that I had friends around for lunch and thought it a much better occasion to crack out a berry dessert for them! I had thought about something alcoholic, but with a 3 year old as one of the lunch guests I thought the better of it, and it ended up being a great hit - raspberries are her favourite!

As a kid, I always loved raspberry ripple ice cream, there were never enough ripples though. Not so when you make your own! This experiment had lots of ripple through a deliciously creamy white chocolate ice cream.

White Chocolate Raspberry Ripple Ice Cream

White Chocolate Ice Cream
5 egg yolks
110g caster sugar
250ml milk
500ml thickened cream
150g white chocolate


Raspberry Ripple
300g Raspberries (I used frozen ones)
30g sugar

For the White Chocolate Ice Cream

Melt the white chocolate with the milk and cream over a low heat;
Meanwhile, whisk the egg yolks with the sugar till thick is a very light cream colour;
When the milk/cream/choc mixture is almost at boiling point, whisk to combine with the egg yolk/ sugar mix;
Return to the heat in a clean saucepan and stir constantly over a low heat till thick and custardy;
Remove from heat to cool, then refrigerate till cold;
Churn according to the ice cream maker instructions

For the Raspberry Ripple
In a food processor, whiz the raspberries and sugar together;
Pass through a sieve to make a smooth purée
Refrigerate till required.

Putting it together
When the ice cream is churned, scoop half into a container;
Pour over the purée;
Scoop in the other half of the ice cream;
With a knife (not sharp) swirl the purée through the ice cream to make the ripple;
Put in the freezer to freeze through completely;
Serve with fresh raspberries.


Saturday, August 11, 2012

Barnacle Bills

Scallops Deling
On a recent trip to Cairns even though short we of course had to pay a visit to his favourite restaurant Barnacle Bills. When he was living and working there it was a real institution and he knew and hung out with the some of the family of the family owned and run establishment. It is a classic seafood restaurant on the esplanade with a fabulous menu and generous portions. We started off with a share plate of scallops and pork belly. Yum! What a delicious combination.

Seafood Curry
For some reason I had been craving curry for dinner and unusually for me I chose a seafood curry from the extensive picks of seafood options. I typically don't go for dishes where the seafood flavour has been masked by a strong sauce but this one was perfect. There was just enough heat but the sauce really complimented the perfectly cooked fish and seafood. After filling up on entree and main full of the flavour of the sea there was no way I could fit in dessert, but a great evening and can't wait for our next trip to TNQ so we can pay another visit!

Top of the Pop(up)s

On Monday night we had a very unique experience at Bar H, a little stylish contemporary bar in Surry Hills. Tonight wasn't a normal night there but one when the kitchen was taken over by Mindy, Audra and Kylie - our favourite MasterChef girls! I was ecstatic to get a booking after feeling like I had left it a bit late for the "first in best dressed" booking policy so Audra's confirmation made my day! And how glad I was - such a fun evening and great food. It is a strange thing meeting the MasterChef girls. We know them so well like friends we have shared every evening for the last few months with so it didn't feel surprising when we walked in and there was Audra greeting everyone while Mindy and Kylie smiled and cooked in the open plan kitchen.

The service was fantastic and drinks were here in no time for my hubbie and I to toast to the meal to come. The little bowl of caramelised nuts and tiny crispy fish reminded me of snacks in the Philippines and Japan so I couldn't stop going back for another nibble! The girls greeted everyone and announced a family style menu. First up was a 3 pepper chicken served in a bag for everyone to dig in. The pepper hit was great and what succulent pieces of meat. We polished off our bag in no time and soon it was an amazing slow cooked beef short ribs in an Asian sauce with some Gai lan stir fried with garlic and chilli - some of our favourite flavour combinations. No sooner had we polished off the beef, but a Mapo Tofu (Grandmothers tofu) was presented. It looked fabulous, but I was worried I was going to have to eat this one alone, as Cam isn't a big tofu fan. I gave him a bit to try and he was hooked! The spiciness with the Chinese sausage and pork mince complemented the tofu perfectly and we finished our plate.

With our mouths still with that slight chilli burn, we were presented with an individual dessert with a number of components. There was a lychee granita - so sherbetty and with such great lychee flavour that it cleansed the palate beautifully before the black sesame ice cream and the coconut tapioca with fried won ton slivers to give a crispy texture. All the flavours worked so well as a great end to a fabulous meal - or so we thought!

Just before we got kicked out so they could prepare for the next sitting finally came a Szechuan Salt Chocolate Truffle and a home made fortune cookie! Now it truly was the end, and the girls calmly saw everyone off before I'm sure they rushed back to the stove to prepare for the next round!

It really was a night to remember, the food, the wonderful hostesses and the fun!

Sunday, July 29, 2012

Easy as Pie

Lamb Pies
We were given a pie maker for Christmas a few years ago and whilst it isn't exactly an appliance I pull out on a weekly basis it is still an amazing gadget (for the kitchen that has pretty much all of them!) All Aussie love a meat pie but who knows what goes into them? Well this pie maker means that I always do! We recently got a bumper slow cooker so I could make multiple quantities of stews to freeze and what great pie filling they make! A quick defrost and then we're a go. I just use the ready made pasty sheets for convenience, cut a few rounds to fit the machine and we're cooking! A great way to engage fussy eater kids and whip up a quick but scrumptious lunch!

Monday, July 16, 2012

Chocolate Orange Hazelnut Frangipane Tart

Maggie Beer Inspired Mini Frangipane Tarts
I have been wanting to try making a frangipane tart for a while and when I heard that the Sweet Adventures Blog hop hosted by Dining with a Stud was to be 'nuts' I thought this would be a great opportunity to try it. Having never tried one, I thought I'd better go with a tried and tested recipe, so I found Maggie Beer's Rhubarb Frangipane in an old MasterChef Magazine. I wasn't happy, though not to try something a bit adventurous for the blog hop. My hubbie suggested choc orange as a flavour combo to go with nuts, and when I saw hazelnut meal in Woolies I was convinced that would be a great match. Not content to jump straight into adaptation, I made the original one too but did them in a muffin tin so we could have mini versions of both! They were pretty rustic looking, because the pastry is quite tough to work with in such a small hole, but both worked really well, and they were the perfect size for being able to taste both! Personally I preferred the original with the tart rhubarb, but all the guest loved the chocolate orange hazelnut flavour - rich and gooey with the melted chocolate inside and perfect for chocaholics!

I am not going to post Maggie's Rhubarb Frangipane recipe here, but just the Choc Orange Hazelnut Frangipane. It's based very heavily on Maggie's in the method, but obviously the ingredients differ! Also, I used her pastry recipe with sour cream recipe too - Thanks Maggie for the inspiration today :-)

Chocolate Orange Hazelnut Frangipane Tart

Maggie's Sour Cream Pastry
100g cold unsalted butter
125g plain flour
1 tablespoon cocoa powder
60g sour cream

Blitz the butter, cocoa powder and flour in a food processor till it resembles breadcrumbs;
Add sour cream and blitz again till combined;
Pour out onto the bench and knead until smooth;
Shape, cover in cling wrap and cool in the fridge for 30 mins

Tarts
Pastry as above
zest of 1 orange
65g unsalted butter
85g caster sugar
1 egg
1 tablespoon of orange liqueur (Grand Marnier or Cointreau would suit - I used Sabra, a Choc Orange Liqueur)
Choc Orange Hazelnut Tarts
1 tablespoon plain flour
100g hazelnut meal
12 squares of dark chocolate
1/4 cup of marmalade
Pastry
Preheat oven to 200C;
Split pastry into 6;
Roll out cooled pastry till it's about 2 mm thick;
Line hole of a muffin tray with thin pastry;
Trim the edges and smooth out in the tin;
Repeat in 6 of the muffin tray holes;
Pierce the base of the pastry with a fork about 3 times each;
Place in the freezer for approx 15 mins;

Tart
Meanwhile, you can start to make the frangipane filling - cream the butter and sugar with the orange zest in the food processor until light and creamy;
Add the egg and beat till combined;
Add the tablespoon of liqueur and blitz again;
Add hazelnut meal and plain flour and process again until combined;

Pastry
Blind bake the pastry for 10-15 mins (cover the pastry with a small sheet of baking paper and pastry weights);
Remove pastry weights and baking paper and return to the oven for 5 mins, or until the pastry is crisp and cooked;
Remove muffin tin from oven and cool slightly;

Tart
Reduce the oven temperature to 170C;
Split the frangipane mixture between the 6 pastry cases;
Push 2 blocks of chocolate into the frangipane mixture;
Put into the oven for 20 mins;
Remove from oven and carefully spread a small teaspoon of marmalade on each of the tarts;
Return to oven for 10 mins or until the filling has puffed up and the marmalade has melted to create a glaze;
Serve warm with thick pouring cream.

Sunday, July 1, 2012

Can't cook? Yes you can!

Gary's French Onion Soup
I can't cook is something that I hear many people say! What I don't understand is that there's not much to cooking - at least home cooking that is.

Restaurant quality dishes are challenging and even me as an avid home cook would never have the creativity, food combination intuition or delicacy to put together some of the amazing concoctions that are served in some of the top restaurants.


No, what I am referring to are people who just think that they can't make food like me. I am no pretender, I make it very clear that I just follow a recipe and out pops an amazing dish! What these friends of mine are lacking is the patience to spend time in the kitchen preparing. 


The other day was a great example. I cooked Gary's Masterclass French Onion Soup which looked so amazing on MasterChef that I had to try it! It is such a simple dish - onions , stock, herbs and cheesy croutons. However, I bet the average non cook wouldn't dare - you know why? I spent about 20 mins peeling and slicing onions - the worst job in the kitchen! And then I spent about an hour caramelising then before adding any other ingredients. All it took was time and patience (and a few tissues to wipe the tears from my eyes!) to create a delicious dish. So anyone out there who thinks they can't cook, go on, to the MasterChef website, set aside an hour and a half and you'll see what an excellent cook you can be!

Sunday, June 24, 2012

My Dude Food Challenge

Duck and Mushroom Arancini with Spicy Saffron Mayo
MasterChef has its "Dude Food" Challenge tonight and I feel like I'm quite well practised in this type of food - way more than the delicate restaurant plating that is normally required.


The entree at our dinner party last night was a good example of hearty but fun snacky "Dude Food". My hubbie requested Arancini balls for his birthday, but with a day of activities planned, I promised it at the next dinner party we hosted. He is very proud of his risotto, which he slaves over for hours, so whilst I got to enjoy that for dinner on Friday night, we made double the dosage so we'd have enough for the risotto balls to serve to our guests as an entree. 

I've never made Arancini before but in my experience the rice in the centre is warm, soft and gooey whilst the breadcrumb is golden and crisp. I had my doubts about whether mine would be exactly that. A good tip of double crumbing though was the secret success factor and after deep frying the balls for a few minutes will golden, the crumb was crispy and the insides perfect -  scrumptious with the spicy saffron mayonnaise!

Monday, June 18, 2012

Pumpkin Pie

We have an American gal from Texas staying with us right now, so when  we were on our way home from work, I asked her about pies from the US to get some inspiration for the Sweet Adventures Blog Hop this month. Pumpkin pie immediately sparked my interest as I have heard that in the States Pumpkin Pie comes right out of a can and into a pre made pastry case, so I thought it might be a challenge to make one from scratch, but where to start? Fast forward to a few mins later when I sat down to think about our menu for meals for next week. I pulled my June '06 copy of Delicious Magazine from the shelf, opened it at a random page to start flicking through, and there it was....Jill Dupleix's recipe for Sweet Pumpkin Pie. It was a sign! So, here we are!

Jill's recipe calls for store bought shortcrust pastry. Whilst I'm a fan of this for making quick pies in my pie maker, today's pie for a Blog Hop called for a home-made pastry too. I also jazzed up the presentation with a blow torch to the marshmallows on top. Whilst this recipe is heavily based on Jill Dupleix's, I adapted it a little too, so here goes:

Pumpkin Pie

Pastry
200g Plain Flour
100g Chilled Butter
Pinch of salt
2-3 tablespoons of water

Filling
1 Butter nut pumpkin
3 eggs
60g fine breadcrumbs
200g brown sugar
1tsp cinnamon
1/2 tsp ground ginger
1/2 tsp all spice
1/4 tsp nutmeg
250ml evaporated milk
Marshmallows to decorate


  • Preheat the Oven to 200C;
  • Halve the pumpkin and lay seed side down on a greased baking tray. Cook until tender for approx 45 mins (fan forced);
  • Meanwhile, prepare the pastry: In the food processor blitz flour, salt and butter till it resembles breadcrumbs; Add water to bind, 1 tbsp at a time. When it starts to form clumps turn it out onto a floured bench top and knead till smooth;
  • Wrap in cling wrap and chill in the fridge for 30 mins;
  • After chilling, roll out the pastry to around 3mm thick. Prick the base a few times with a fork and return to the fridge for around 20 mins to chill again (this prevents the pastry from shrinking in the oven);
  • Line pastry case with the pastry, and then cover with baking paper and pastry weights;
  • Remove pumpkin from the oven and turn off fan;
  • Blind bake the pastry for around 10 mins, then remove weights and baking paper and bake for another 10-15 mins until browning;
  • Meanwhile, remove 350g pulp from the baked pumpkin and set aside to cool;
  • Into the food processor, add the three eggs and whizz gently to lightly beat;
  • Add the pumpkin flesh and process till smooth;
  • Pour in spices, sugar, breadcrumbs and a pinch of salt. Beat till combined;
  • Finally add evaporated milk and blitz till all mixed in and smooth;
  • Pour the mixture into a slightly cooled pastry case and return to oven for 25 mins or until the filling is set;
  • Remove from oven to cool slightly (can be served warm);
  • To serve, line white marshmallows around the outside of the pie. Blow torch to brown the marshmallows;
  • Serve with vanilla ice cream or pouring cream.

Thanks as always to the #SABH team, especially the Kitchen Crusader, for hosting this month's Bloghop!

Sunday, June 10, 2012

Tiers of Joy

Weddings are the happiest occasions, love and joy, champagne and.... cake! Who could ask for more!  There I was toasting to the engagement of good friends at a Christmas party when, after a few drinks, it popped out.... "I could make your cake!" 

I was, of course, really excited to be able to give a three tiered cake as a gift, but it's not a small ask, especially because it would be my first time making a gluten free cake and no pressure, it's just the most important cake in a girls life! Luckily, apart from the gluten free request, the bride was quite relaxed about how it could be, but I had more expectations on myself to make it as good as it could be.

It actually wasn't the first wedding cake I've made, but unlike riding a bike, it's as daunting the second as the first time! The one thing that did fill us with confidence was that in the test version of the Gluten-free rich fruit cake turned out beautifully and we knew that the Marshmallow fondant that we used in the first wedding cake we made a few years ago would be a real winner! 

When it came to baking and decorating the cake it was hectic but fun (apart from the beginning of the icing when my hubbie thought the marshmallow would never become unstuck from his hands!) and the cake, although not perfectly evenly shaped, went down a treat. 

I felt very honoured to be able to be part of my friends' special day and delighted to kick off their marital bliss with a moist, brandy laced fruit cake!

Sunday, May 27, 2012

Tricky Tapas Treat!

Tapas

Normally you get the main followed by dessert, but this time it's the other way round. As you know, from last weeks cheesecake post, it was my hubbie's birthday and I decided to cook up a Spanish inspired tapas selection.

I thought tapas was quite easy - slap a few slices of ham on the plate with a bowl of olives and voila (or rather...ya esta!) - but it was not quite that uninvolved.

The real trick is that lots seem to happen at the last minute. I had stuffed mushrooms grilling, chorizo in cider bubbling, bread baking, tortilla browning, calamari and whitebait frying, garlic prawns sizzling all in the last few minutes. Talk about juggling! The only things that could be done in advance were the ham and olives!

Despite the frenzy in the kitchen, it all turned out and what a feast! Certainly an authenic Spanish celebration meal!

Monday, May 21, 2012

Chai & Port Poached Pear Cheesecake


It was my hubbie's birthday weekend so not only did I have to join the Sweet Adventures Blog Hop with a tea inspired recipe, but I had to make his fave - a cheesecake. Well, what better than combine them both. I drink the odd tea to keep warm at work, but I'm not generally a tea person - much more into coffee (can't wait for the coffee blog hop!) I didn't want to wuss out though being out of my comfort zone, and of course I wanted to give it a go. I did choose a tea with a familiar favour though, to combine with the other ingredients.


Chai & Port Poached Pear Cheesecake (adapted from a recipe from "Eating for Goodness Sake" )

Poached Pears
4 pears
1 litre of Chai tea
500ml Tawny Port

Biscuit Base
200g Scotch Fingers
100g Butter
pinch of cinnamon

Filling
225g Cottage Cheese
70ml Sour Cream
75g Icing Sugar
1 egg
1/2 teaspoon almond essence (or Frangelico!)

Icing Sugar to dust on top

Method

  • Peel, core and quarter the pears;
  • Poach the pears till soft in the tea and port, then leave to cool in the poaching juice;
  • Reserve the poaching liquid for sauce
  • Preheat the oven to 170C
  • Melt the butter for the base;
  • Whizz the biscuits in the food processor;
  • Add the butter and a pinch of cinnamon to the biscuits and whizz till forms clumps;
  • Press the biscuit crumbs into a greased 20cm spring form pan;
  • Line the biscuit base with the quartered poached pears;
  • Whizz the ingredients for the filling together till smooth;
  • Pour the filling over the pears;
  • Bake in the oven for about 20 mins or until the cheesecake has set;
  • Remove from the oven and cool
  • Meanwhile bring the reserved poaching liquid to the boil to reduce
  • Turn out of the spring form pan and dust with icing sugar
  • Serve with extra poached pear and drizzle some of the reduced poaching liquid.

Related Posts Plugin for WordPress, Blogger...