Saturday, December 31, 2011

The Outtakes 2011!


Of course I think of myself as pretty good at cooking - enough to blow my own trumpet about something amazing that I have prepared or eaten on a weekly basis. However, I am not infallible and there have been some shockers that don't make it to the pages of M(i)sCh(i)ef! Normally they are blocked from my memory, but here are a few I choose to remember and share for a giggle as I reflect on my year of cooking and blogging!

Gnocchi - Pre freezer disaster!
Gnocchi - after making a huge batch of gnocchi on my first attempt, I read that it was good for freezing and you could even cook it from frozen. I must have added just a few too many to the boiling water, so that by the time they were cooked, all the gnocchi had disintegrated into a gooey mess.

Profiteroles - away for the weekend, I thought that profiteroles would be a quick easy dessert. I am pretty confident with my choux pastry, but with out kitchen scales, I had to wing the quantities adding a bit of flour here and there to get the right consistency of batter. Unfortunately, that's not exactly how choux pastry is made so they didn't puff up, but were flat biscuit-like rings! Next time I've promised my friends proper profiteroles, so I'd better live up to that when I have my trust scales!

The Successful Strawberry Sorbet
Ice cream - sometimes I can get quite impatient in the kitchen, and a little cocky! I made custard for ice cream the other day and was too impatient to follow the recipe thinking I knew better and ended up with scrambled eggs! I ended up making strawberry sorbet instead!

Crab omelette - after a long day of work, working out etc. I sometimes feel a bit exahusted. Last week I thought I'd make a quick Asian omelette. Just as well I checked the recipe a few times only to realise that I had mistaken tablespoons for teaspoons and put in quite a lot more soy sauce than I was meant making a horrible brown coloured egg mixture!

Kahlua Truffles - Making my work colleagues a Christmas gift was supposed to be easy - a recipe I've done over and over since I was little - I thought I'd go fancy and get Lindt 70% Cacao Chocolate to be extra special, only to find that the higher the percentage, the more liquid is required to prevent it from seizing. The mixture ended up like a yucky sludge! My successful attempt used only 40% chocolate.

So tonight, I'll be raising a glass to toast the successes (and failures) of 2011! Here's to a fab 2012!

Monday, December 26, 2011

Edible Gifts - Kahlua Truffles


Kahlua Truffles

One of the benefits of working with a food blogger is that my colleagues sometimes get to taste the fruits of each weeks labour. This Christmas, I thought I would make something just for them. I decided to try out my own variation of rum truffles that I used to make as a kid, instead of rum, using Kahlua. The truffles are super rich so a few are plenty and one bite keeps your chocolate intake up over the holidays! They aren't exclusively a Christmas chocolate. In the past I've made them for Valentine's Day gifts and filled Easter Eggs with them, so they're pretty versatile - for any day of the year where Chocolate is an appropriate gift (read, any day of the year!) I chose a festive presentation and gave everyone a little box decorated in Christmassy style!

I learnt (the hard way) that a lower grade percentage of chocolate is better so used a 40% cacao, not higher (for the successful attempt!)

Kahlua Truffles
This makes about 70 truffles

600g dark chocolate
85g butter
6 egg yolks
6 teaspoons of Kahlua
Cocoa Powder (for decorating)
Truffle cases

  • Melt the chocolate and butter in a double boiler until smooth;
  • Allow the chocolate mixture to cool slightly
  • Gradually add in one egg yolk at a time whisking as you go blending in the mixture so it's smooth and silky;
  • After adding in the egg yolks, add the Kahlua gradually too whisking as you add;
  • Chill in the fridge overnight;
  • Using a melon baller or a small ice cream scoop, scoop out enough mixture to make into little balls;
  • Roll in cocoa powder to lightly cover;
  • Place in truffle cases.


Wednesday, December 21, 2011

Black & White Wednesday - Homemade Gnocchi

I made this Gnocchi a few months ago and chose it for posting in this weeks Black and White Wednesday run by Susan from the Well Seasoned Cook

Home made Gnocchi

Monday, December 19, 2011

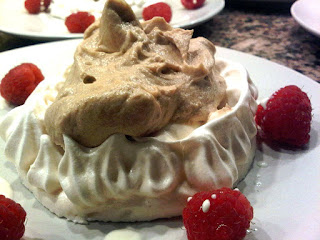
Mont Blanc Meringue Nests


Chestnuts seem to be traditional in the UK more than in Australia around Christmas. The smells of hot chestnut sellers in the street are a common scent on the main street of Edinburgh, and for a break whilst Christmas shopping it's a treat to warm your hands on a bag of the smoky, soft nuts.

© Catherine Kennedy -
Beneath the Water
In Australia, "chestnuts roasting on an open fire" is just a line of a Nat King Cole carol, somewhat inappropriate for a scorching summer day, so the Aussies need a different way to enjoy chestnuts in December.

For this Sweet Adventure Blog Hop I thought I'd suggest a way....

...Mont Blanc Meringue Nests.

Supposedly named as the dish resembles the highest European mountain, Mont Blanc when referring to dessert, includes a chestnut purée and is usually topped with whipped cream (I substituted pouring cream in my dish).

The taste of the chestnut cream is very distinctive so when I ran my finger through the cream left on the food processor blades (yes, I still lick the bowl!), childhood memories were reignited of dinner parties round my parents table. The flavour is hard to explain, but a fabulous combination the nutty flavour with a hint of sweetness and a dash of sherry and it balances the sweetness of the meringue perfectly. The meringue nests are a perfect end to a December festive meal, generous and elegant but light at the same time.

Mont Blanc Meringue Nests (adapted from the recipe in an old favourite: Reader's Digest, the Cookery Year)

Serves 12

Meringue nests
6 egg whites
330g caster sugar
2 pinches cream of tartar (anyone wondering what this is and why you use it, here is a great post I found from A Pie for a Pie)

Chestnut cream
150g butter
100g caster sugar
425ml can of chestnut purée
35ml dry sherry

To serve
Pouring cream
Raspberries

Meringue nests

  • Preheat the oven to 100°
  • Spray oil and line 2 large baking trays with baking paper. Spray the top of the paper lightly too!
  • Beat the egg whites until they form stiff peaks. 
  • Gradually add the sugar and cream of tartar. 
  • Beat well till all the sugar has been completely combined and the mixture is smooth and silky and holds it's shape.
  • Take a large spoonful of mixture and use the back of the spoon to shape into a round base on the baking tray. You need to fit 6 rounds (about 10cm diameter)
  • Repeat for all 12. You should still have plenty mixture left.
  • Fill a piping bag with the remainder (using the large star nozzle).
  • Pipe a ring of rosettes around the circumference of the meringue circles making a nest.
  • Place trays in the oven and bake for 2 hours. Then turn off the oven and leave the meringues in there till the oven is cool, preferably over night.
  • When I made mine, I sneakily (and v. carefully) moved them all after 2 hours so I knew they hadn't stuck to the baking paper before I left them overnight.
  • Store in an air tight container until you serve them, or they might get soggy!


Chestnut cream

  • Cream the butter and sugar together until light and fluffy. 
  • Gradually add a spoonful of chestnut puree and beat in well. Be careful not to add too much at once as the mixture might curdle.
  • Keep beating until all the chestnut puree is combined.
  • Next, add the sherry gradually, one teaspoon at a time, continuing to beat well to incorporate each spoonful. (The process of adding the puree and sherry is much easier in a food processor as I leave the motor running and drop the spoonfuls down the shoot!)
  • You can either leave the cream aside or assemble the meringue nests straight away. Just don't assemble the meringue nests until you are ready to serve.


Assembly

  • Spoon the chestnut cream into the meringue nest centre.
  • Decorate the plate with raspberries and a drizzle of cream.
  • Serve with the pouring cream on the side for those who want more!

Saturday, December 10, 2011

Festive Stuffed Chicken Thigh - Easy Christmas Dinner!

I like to have my Christmas Cake and eat it too! What I really mean is that I don't like to limit my Christmas spread just to Turkey or Ham or Prawns or..... The trouble with cooking for so many people and wanting such a variety is the oven space. Inspired by Christmas recipes of stuffed, rolled birds, I designed an easy festive stuffed Chicken Thigh that we're going to serve as part of a banquet for the family on Christmas Day. The thigh is much more moist than the breast, which is why I chose that part of the chook, and is a small enough to be individual and big enough to roll and with some tasty stuffing inside! We also cooked it on the BBQ meaning that the precious oven space will be freed up for bigger (not necessarily better) things!

Chicken Thighs on the BBQ
Festive Stuffed Chicken Thighs

Ingredients

Chicken Thighs - 1 per person
Bunch of Sage
Prosciutto - 1 slice per thigh

Stuffing (this stuffed 8 Chicken Thighs)
350g. sausage meat
1 med onion (or 2 spring onions), finely diced
4 sage leaves, chopped
Salt & Pepper

Sauce
Craisins
1 cup Red wine
2 tbs Plain Flour
2 tbs Redcurrant Jelly

The raw unrolled Festive Stuffed Chicken Thigh

  • Prepare the stuffing first - mix all the ingredients together in a bowl. Divide into equal portions (as many as you have chicken thighs);
  • Spread the Chicken Thighs out flat and lay them on a board;
  • Cover the Thighs with cling wrap;
  • With a rolling pin, or another hard implement (meat tenderiser would do too!) whack the Chicken Thighs till they are flat;
  • Lay a slice of prosciutto on a piece of foil (enough to wrap the whole thigh)
  • Place a sage leaf on the prosciutto;
  • Lay the flat chicken thigh along the proscuitto on top of the sage
  • Place a ball of stuffing on the thigh and roll it tightly
  • Wrap the foil tightly round the rolled meat;
  • Repeat for the other Chicken Thighs;
  • Leave to rest in the fridge;
  • Meanwhile, soak the craisins in the Red wine for the Sauce
  • When ready to cook, heat the BBQ;
  • Remove the thighs from the foil and carefully place on the BBQ;
  • BBQ turning often until the roll is cooked through.
  • While the Thighs are cooking, prepare the sauce by adding the craisins and wine to a small saucepan;
  • Add the redcurrant jelly and bring to the boil;
  • Add a dash or red wine to the flour and stir to make a paste. Add the flour to the sauce to thicken it and make it glossy.


Wednesday, December 7, 2011

Black & White Wednesday - Kaffir Lime Pannacotta with Finger Lime Syrup

I found this picture when looking for my next photo for posting in Black and White Wednesday run by Susan from the Well Seasoned Cook

The pannacotta lended itself to black and white with the black flecks of vanilla bean contrasting with the white of the smooth pannacotta.

Kaffir Lime Pannacotta with Finger Lime Syrup

Sunday, December 4, 2011

If Music be the Food of Love...


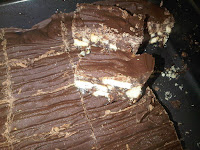
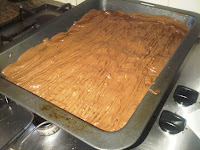
Chocolate Gunge

...We'd better feed the musicians!

In my offline life I play the violin in the Eastern Sydney Chamber Orchestra. Every concert the orchestra members pitch in a contribution to the afternoon tea for the audience to look forward to during the first half and to keep the sugar rush and adrenalin of the players high to see them through till the end of the concert!

This time I decided to bake an old favourite family recipe originally passed to us from a great family friend. It is a simple but amazing moreish kid friendly snack called Chocolate Gunge! Gooey and chocolatey, it attracted audience and orchestra members young and old!

When I say "recipe" I mean I kinda remember from my childhood what we put in and how we made it, so to help me commit it to memory for next time and to give a quick, easy and cheap ($7.36 for the whole lot) winner dish for the next kids party, or orchestra afternoon tea, I am sharing it here!

Chocolate Gunge

250g butter ($1.55)
395g can of condensed milk - ($1.79)
Cocoa powder (in the pantry)
250g scotch fingers - ($0.95)
250g milk arrowroot - ($1.09)
375g Milk chocolate - ($1.92)


  • Melt butter in a large saucepan. Remove from heat;
  • Add condensed milk and coca powder and stir well;
  • Crush the biscuits with a rolling pin or in a food processor till broken into small (approx 1cm pieces) but not crumbs;
  • Add biscuits to cocoa mixture and mix well;
  • Turn out into a rectangular baking tray;
  • Chill;
  • Meanwhile, melt the milk chocolate in a double boiler - a heat proof bowl sitting on top of a saucepan of water (but not touching the water) on the boil;
  • When biscuits are chilled, pour over the melted chocolate;
  • Spread the chocolate evenly over the biscuit and then make a swirly pattern using a fork;
  • Return to the fridge overnight or till the chocolate is solid;
  • Slice into 2cm square pieces and serve.


Don't expect it to last long!

Wednesday, November 30, 2011

Black & White Wednesday - Pavlova


It's amazing how when you start looking, things you've never noticed before start popping up everywhere. That is what happened as I started posting in Black and White Wednesday run by Susan from the Well Seasoned Cook


Last Sunday was the Sweet Adventures Great Australian Pavlova Blog Hop (or #pavbloghop for short) and one pic that didn't make my blog post on the weekend was the raw pav about to go into the oven. When I reviewed the original photo it seemed almost black and white even in "colour" so perfect for submission this week!


Pavlova in Black and White


Sunday, November 27, 2011

Upside Down Lemon Meringue Pie Pavlova


Being part of a pavlova blog hop meant that in order to add something a little different to the mix, creativity was the key. I looked around my kitchen and had heaps of lemons, and thought about making a lemon meringue pie. Then it dawned on me that instead of a pie, I could do an upside-down version and use it as my pavlova entry!

Straight lemon curd I felt would be a little overwhelming on the already sweet pavlova base, so I merged the traditional cream with some home made lemon curd to make a tangy creamy topping.

Upside Down Lemon Meringue Pie Pavlova
To balance against the sweetness, I picked raspberries and blueberries which aren't as sweet as other fruit.

I wanted to replicate the pie base texture so I crumbled a little lemon shortbread on the top. It was a nice addition giving a little extra texture as well as the crisp pavlova shell.

The result was an indulgent dessert! Perfect for a summer evening!

Pavlova

4 Egg whites
200g Caster sugar (for 5 egg whites: 220g caster sugar, for 6 egg whites: 250g caster sugar)
2 tsp corn flour
1 tsp vanilla essence
  • Pre heat oven to 100º;
  • Line a baking tray with baking paper;
  • Whisk egg whites till they form hard peaks and the bowl can be turned upside down without the egg whites moving;
  • Slowly add the caster sugar spoon at a time;
  • When sugar is combined and mixture is glossy, add corn flour and vanilla essence;
  • Scoop the mixture on to the lined tray and cook for 1 hour - 1 hour 20 mins until the outside is just crisp;
  • Leave the pavlova to cool in the oven with the door open for a few hours till the oven is completely cold. Close the door and leave till cool. 
Home-made Lemon Curd
Lemon Curd
this makes extra lemon curd but it can be kept in the fridge for a few weeks

2 eggs + 2 egg yolks
165g caster sugar
80g butter
zest and juice of 2 lemons

I used my saucier for making the lemon curd, but I don't know if this is a gadget that features in many kitchens. For those who don't have every gadget under the sun:
  • Stir the eggs with sugar until the mixture is smooth; 
  • Add the zest and lemon juice; 
  • On a low heat, stirring constantly, gradually add the butter; 
  • Keep stirring until the mixture is thick. This will probably take about 20 -30 mins; 
  • When thick, pour into a jar and cool completely.
Before the Oven - Lemon
Shortbread Crumb
Lemon Shortbread Crumb
this makes 12 fingers - you only need 1 for the pavlova recipe so if you want to drop a step, just use a bought shortbread finger!

125g plain flour
80g butter
40g caster sugar
zest of 1 lemon

  • In the food processor whiz the flour and butter until the mixture looks like breadcrumbs; 
  • Add the caster sugar and zest, and combine;
  • Knead the mixture till smooth and shape into a 2cm diameter sausage;
  • Wrap with Cling film and chill for 30 mins; 
  • Preheat the oven to 170º; 
  • Slice the chilled shortbread dough into 0.5cm slices; 
  • Lay on a baking tray and bake for 10 - 15 mins until golden brown; 
  • Remove from the oven and cool.
The "finished" product
Assembling

300ml thickened cream
handful of raspberries
handful of blueberries

  • Whip the cream until it reaches a stiff peak consistency;
  • Gently fold in half of the lemon curd. Try not to completely combine the curd, but swirl it into a ripple effect;
  • Top the pavlova with the lemon curd cream mixture;
  • Decorate with raspberries and blueberries;
  • Crumble 1 small shortbread piece over.


Wednesday, November 23, 2011

Black & White Wednesday - Ink Risotto

In my first contribution to Black and White Wednesday run by Susan from the Well Seasoned Cook, I am showcasing the Ink Risotto with seared calamari, gremolata and parsley oil I had at Pier Restaurant the other day. It suited the black and white effect as the contrast between the black of the risotto and the almost translucent seared calamari gave the dish a dramatic effect which is highlighted in the black and white version.
Ink Risotto with seared Calamari, Gremolata & Parsley Oil, Pier Restaurant, Rose Bay, Sydney

Saturday, November 19, 2011

Eat Drink Blog 2011

Slow Cooked Lamb with Broad beans and Tomato Salad for Lunch
One of the great things about any hobby is the ability to share it with others! Foodies are lucky in that there is never a shortage of friends hanging around when a piping hot roast comes out of the oven, or a freshly iced cake gets sliced! It's always nice though to meet other like minded food bloggers from whom you can share war stories, pick up tips and tricks and exchange ideas.

The Eat Drink Blog 2011 Food Bloggers Conference was that opportunity!

As you would expect from a Food Bloggers Conference there was no shortage of delicious food and one of the highlights was the delicious Slow Cooked Lamb lunch followed by the Lamb MasterClass by Nonie Dwyer. It was just like being in a MasterClass on MasterChef as Nonie broke down the lamb and whipped up some deep fried lamb bacon, lamb neck stew and demonstrated how to replicate her amazing lunch. The aromas of the spices that had teased the audience through the first half of the days sessions on legal and copyright matters,  SEO techniques and an insightful presentation on blog writing by Valerie Khoo, were revealed!

To work off the bellies full of food in the afternoon, Peter Georgakopoulos got the creative juices flowing in a Food Styling Workshop, Quentin Jones gave workable tips to the every day Food Photographer and some filled up even more at Kingsleys Crab MasterClass or Brasserie Bread's Sour Dough session.

After even more info on ditching the day job for full time blogging, and bloggers ethics, the Conference kicked on to Kingsleys Steakhouse for a wonderful dinner. Thanks to the Eat Drink Blog crew for an inspiring informative day meeting great new friends!

Thanks to the organisers: Trina from the Gourmet Forager, Jen from Jenius, Simon from the Heart of Food and Reemski from TummyRumble
and to the generous sponsors who enabled such an awesome experience:

Electrolux for the conference venue
Toby’s Estate for providing tea, coffee & a barista
Breville for providing a juice bar
Daylesford and Hepburn Mineral Springs Co. for providing non-alcoholic beverages
Brasserie Bread for providing breakfast as well as morning and afternoon tea
Meat and Livestock Australia for providing lunch
Pacific Restaurant Group for providing dinner

Saturday, November 12, 2011

Welcome to Sydney Jamie!


Bucatini Carbonara at Jamie's Italian

We were trying our luck to get into Jamie's Italian, Sydney's first offering from our favourite chef, Jamie Oliver, on the first Saturday of it opening, but with the no booking policy I figured we had as much hope as anybody. Just for Jamie we agreed to the 30 min wait for a table for 4. As it turned out, a date would have been quicker as there are plenty tables of 2! It was well worth the wait!

Being from the UK it was great to have some banter early on with the English bar men, shaking up mojitos and topping up our champagne glass, so the half hour went quickly by.

The two level restaurant on Pitt Street is urban chic style - some classy graffiti on the walls, warehouse style decor, and pretty unexpected nestled between the impersonal office blocks flanking each side. Perfect for the casual style of the restaurant.

We enjoyed the salt and pepper squid and the Arancini risotto balls as a first course. The pasta - I couldn't get past the traditional carbonara - was deliciously al dente, and apparenetly the sausages were served with the best lentils our friend had ever tasted.

With attentive staff, a fun ambience and great food. We would have been happy to hang around, but the theatre called. Anyway, we'll be back and I think it will be a city favourite, a reasonably priced fun and delicious restaurant certainly filling a gap and very welcome!

Saturday, November 5, 2011

Bircher Brekkie


Serving Bircher Muesli in a Bowl
Breakfast like a king they say! That's all very well on the weekend when there is enough time to prepare but not so running from the early morning workout, to the shower to work!

It's all to easy too to get into the habit of buying breakfast every morning - doorstop wedges of toast with butter and jam takes away all the hard work of my gym slog though.

So, it has to be something to take to work and I found a great solution. Bircher Muesli! Apparently the soaking of the oats in juice activates the enzymes which is good for you? I just think it tastes great! Shop bought Muesli can be packed with sugar. This recipe's sugar content at least comes from the dried fruit rather than any added sweetening. Why make your own muesli if only to add some "not so fresh" juice so  I opted for freshly squeezed orange.

My Tupperware-full of Bircher Muesli
I sometimes make a big tupperware at the start of the week and take a few spoonfuls of the muesli out to take to work. Alternatively, sometimes I make up the dry ingredients in advance and take a half cup of that in a mini tupperware with half a squeezed orange. I let that soak overnight and add a few scoops of yoghurt before rushing out the door.

You can add grated apple, a couple of sliced strawberries or even a small handful of frozen mixed berries to the tupperware. They have defrosted by the time I get to work making a perfect accompaniment!


Dry Bircher Muesli Ingredients
Bircher muesli

2 cups oats
1/2 cup pepitas (pumpkin seeds)
1/2 cup sunflower seeds
1/2 cup goji berries
1/2 cup currants or raisins or sultanas
Juice of 3 oranges
250g unsweetened yoghurt


  • Mix the dry ingredients together in a bowl or tupperware container.
  • Squeeze the oranges and add the juice to the oats,seeds, dried fruit mix.
  • Stir to combine.
  • Leave for an hour or overnight for the juice to be absorbed.
  • Add yoghurt and mix well.
  • Serve as desired (see ideas above)

Saturday, October 29, 2011

Oodles of Noodles


Noodles at the Night Noodle Market

The Night Noodle market is one of the more accessible events of the Sydney Crave Food Festival. We went along one October Friday night for a bite to eat at one of the plethora of stalls set up in Hyde Park.

When I called this post Oodles of Noodles, I think it should have been Oodles of people. It's a pretty popular event and lots of queues across the park for the stalls that brought noodles and typical accompaniments from a wide range of countries.

There were noodles, dumplings and rice dishes from China, Japanese pancakes and noodles, as well as Malay satay, Indian and Thai curries. A melting pot of culture and cuisines!

Oodles of People
I am lucky that being a Citibank cardholder (this is not a sponsored post by the way) there was a special VIP seating area that we could use. It really made all the difference so once we'd picked up our ironically non-noodle dishes - dim sums, Peking duck pancakes and pork ribs with rice - we had a seat and table awaiting so we could tuck into our wares!

The food was typical street food and I am not really a huge fan of plastic plates and cutlery but was a fun evening out to get into the spirit of the Food festival.

Saturday, October 22, 2011

Heavenly Hanuman

Hanuman Oysters
Jimmy Shu's Hanuman restaurant was one that was overwhelmingly recommended by those hearing we were heading to Darwin and for those that know us, they could have been pretty sure it would be a hit with a signature dish of oysters with a spicy sauce - our favourites all rolled in to one!

On the menu for us, as well as the signature oysters, we also had some delicious Trumpet Mushrooms, with lightly curried pork & prawn mince, and a coconut sauce, and tandoori prawns.

Rogan Josh Lamb Shanks
The Indian inspired Rogan Josh Lamb Shanks were probably the best lamb shanks I've had -l'll be trying that out when the cold weather comes again next year!  My fave Indian dish, chicken tikka masala didn't disappoint, and we left feeling very satisfied, but not satisfied that we'd done the menu justice and had to come back again for another try, this time of the Thai style dishes. For our second visit, we tasted the Meen Moolie, barramundi spiced with turmeric in a creamy coconut sauce and Cam's staple Thai favourite - Red Curry Duck. What is usually a sweet dish, was beautifully balanced with great spicy and fresh pineapple to counter balance.

Trumpet Mushrooms
We didn't even look at the dessert menu we were so full, but could quite happily come back for more another time. Just a shame Hanuman Sydney isn't on the cards.

Sunday, October 16, 2011

Top End Dining


Garlic Prawn Salad

Heading out into the bush with a small Engel fridge, $20 Big W Wok and fry pan set, and a mini sharp knife challenges our foodie creative juices to come up with space efficient, easy to prepare, convenient dishes. Normally shunning prepackage, preprepared food, we gravitate to the relatively unknown when camping. Not prepackaged food like boxed macaroni cheese mind you, but the presliced stir fry veg packs and bags of salad.

Steak and Salad
Steak and salad is a staple camping repertoire. Seared med rare meat with healthy greens being a no fuss option for our first night. One of our highlight meals was a frozen pack of garlic prawns tossed through Italian leaves for a protein rich light dinner. Although frozen, the prawns tasted delicious and stayed fresh a lot longer on oiur travels than had we have bought fresh, and far superior to a canned fish option as an alternative.

Camping Kitchen Stir fry
We attempted a few stir frys, slicing our own meat to add to the pre-sliced veg pack. It was so simple to have fresh meat and crispy veg flashed in the wok and was wonderful and tasty!

Top End dining while on the road - convenient but delish to keep these two foodies happy!

Tuesday, October 11, 2011

Lime Time

I don't have green fingers - they are much more comfortable in the kitchen than in the garden. However, I do enjoy our little pots on the balcony (that my hubbie nurtures) with herbs and other edible additions to our cooking.

After a windy winter most of our flora needs a rejuvenation, but when I went out to water the other day, a somewhat lackluster shrub suddenly had a new lease of life with fresh new green branches.

I was delighted that the kaffir lime tree was flourishing again as we often pluck off a few leaves to season dishes with the subtle citrus flavour. 


We love preparing Thai food and along with coriander (which we've had less lucky growing) it goes in everything - finely sliced in larb, whizzed up in green curry sauce for a Thai chicken curry, infused in chicken coconut broth, blended in Thai fish cakes and even flavouring a kaffir lime panna cota.

With the new spring blooms, I am inspired to look out a few more kaffir lime recipes to add to the repertoire to make good use of our home grown ingredients! Any favourites you recommend?

Sunday, October 2, 2011

Universal Success


Seared Scallops

Since I saw Jimmy and Claire at Universal restaurant last season of MasterChef, I've been looking for an opportunity to pay it a visit. I knew I would enjoy Christine Manfield's food style as I love spicy dishes. 


Using the excuse of a free bottle of wine, thanks to Citibank's Dining deal, we headed down a few Friday's ago to the Darlinghurst restaurant. No wonder I hadn't heard of it before MasterChef as it's in a small courtyard near not very much else!
Steamed Snapper

The whole experience was right up my alley! There was a "smart casual" feel to the restaurant with coloured lights and the buzz of light conversation, but with a fine dining presentation. What I loved about the food at Universal was that the spice complemented each dish in a different way. They also used great produce showcasing the fantastic flavour without the hype of foams and jellys of some of the more serious restaurants. This just made it a bit more relaxed and made us feel a bit more at home than when we're on our best behaviour on one off visits to "posh" restaurants!

The shared plates were perfect sized and fun for us, and perfect since there was no order envy and we got to taste quite a few things on the menu. We went for seared scallops green asparagus tempura with wasabi avocado, pork belly, steamed pink snapper wrapped in jamon with white asparagus, sichuan pepper mandarin duck, slow braised green chilli galangal wagyu beef shin.

Universal was a great success and will become a real favourite for us. Can't wait for the next excuse to dine there!

Sunday, September 25, 2011

Hot Home Cook!


Cam's Chilli

We love having dinner parties and I enjoy trawling the recipe books and magazines for things to prepare for our guests that will be impressive looking and delicious. Sometimes, however, no matter how long I trawl, I can't find the right thing. I'm all for preparing days in advance when I have lots of time, but most weekends when we have friends round it's a marathon Sat to shop, clean, tidy the house and cook!

The last occasion I realised that my efforts of fine dining where really too stressful and what we have for dinner on a daily basis, presented nicely, is exciting enough to serve for our guests who are envious of our lunch leftovers!I put this to the test at our last dinner party. A week before my hubbie had made a fabulous beef chilli in the slow cooker so we decided to try this out with our guests. With autumn kicking in, the evenings are still cool enough for a warming, spicy feed, and the slow cooker is a sure win for juicy tender meat that melts in the mouth! To step the menu up a bit I found a delicious and simple cornbread recipe to accompany the chilli. It looked impressive, sliced beautifully (no crumbly slices) and balanced the spice of the chilli really nicely.

Jaffa Profiteroles
For dessert, an old favourite with a twist: profiteroles with chocolate orange sauce. I can whip these up pretty quickly and they are an easy dessert to prepare prior to the guests arriving. A little orange zest in the cream gave it a citrusy flavour and a glug of Sabra, an Isreali chocolate orange liqueur was an unusual addition to the chocolate sauce.

All in all, our guests were delighted and it was a much easier and enjoyable evening being a hot home cook than a fine dining fail!

Saturday, September 17, 2011

Biggest Winner

Chicken with Herbed Yoghurt
We have just embarked on Michelle Bridge's 12WBT - 12 weeks of healthy eating, daily exercise and total mindset overhaul. Being a foodie, I was a bit reluctant to commit to someone else's menu for weeks, but so far so good. The food has been right up our alley so far.

On Monday we took the leap of faith, not only on a new menu, but on the weather and had our first salad of the season. The char grilled chicken and leaves were boosted by a delicious herb dressing. Normally I'm not a huge fan of yoghurt dressings, but this was so disguised that it really worked!

Beef strips with Corn, Capsicum Salsa
Tuesday was a take on Mexican. The rump steak that looked surprisingly small in the packet was delicious and juicy, and worked so nicely with the roasted capsicum and corn. We probably left it resting a little too long, as it cooled down a bit, but was delicious nonetheless. Looking at it, you'd never guess that was a cut down portion, highlighting how much our portion control was really out of control!

Thai Fish Cakes
The Thai Fish Cakes were also a winner. I've made fish cakes before and always forget how easy it is. Mish's recipe was so tasty and fresh, without too much fuss. Instead of the recommended salad of bean sprouts, I made a quick stir fry using similar ingredients  which went as nicely with the fish cakes as I'm sure the salad option would have.

 I'm looking forward to tonight's treat, Lasagne! Not necessarily known for it's weight loss properties, this one has a fraction of the mince and triple the veg, but the "meat" mixture looked surprisingly similar to the meat packed version we're used to!

The food looks vibrant and I've enjoyed the push to portion control without being hungry! Whilst the outcome may be that I become a big LOSER, at the moment, I'm feeling pretty happy that these recipes I've committed to for the next 12 weeks are a winner!


Monday, September 12, 2011

Juicy Fruit

Fresh Orange & Mandarin Juice
As spring comes round again, and we had friends for breakfast, I decided to bring the juicer out of hibernation. There's no excuse really for not making fresh juice at any time of year, but it just seems as the mornings are no longer so icy, that the thought of a freshly squeezed juice with breakfast sounds way more appealing!

I had a batch of murcott mandarins full of seeds which was just disappointing. Instead of them going to waste, as I'd given up battling with them to eat, I decided to mix them up with some fresh navel oranges, which are also in season over winter, and make a big jug of fresh orange.

We have had our juicer for about 5 years now, so we have two good tips to make it easy:
Our first tip is to put a small plastic bag into the waste container (the ones that you put veg into in the supermarket) When you're done, you just lift out the bag full of pulp and waste, and replace the bag. That way, it's one less thing to wash, and you're not spending time fishing fruit gunk out of the sink!

Another tip is to peel the oranges the night before. Especially in the summer, fruit can get a little warm at room temperature. We peel our oranges the previous evening and store it in a tupperware in the fridge. That way, especially on a weekday morning when we're in a rush, there's no excuses, we just thrown them straight in the juicer, and there is no need for ice to cool it down.

Monday, September 5, 2011

Snap, Crackle and Pop!


Crispy skin is one of those amazing inventions that features in kitchens all over the globe in different guises. My favourite is pork crackling! To me, the test of the oven of my rentals is the crackling test. If I could make perfect pork crackling I was on to a winner! I still remember the disappointment of my last rental place with the elements on the bottom of the oven making crunchy crackling almost impossible.
When making roast pork for friends I never like to promise crackling just in case it doesn't quite deliver,  but even though I say so myself, I'm getting quite consistent at putting up a great attempt each time.

I've picked up a few tips along the way that have helped which hopefully will help you succeed with a fantastic snap, crackle and pop!


Perfect Crackling & Roast Pork

  • Preheat the oven really high. The recipe might say 200 but I crank it up to the highest setting!
  • I dry the skin really thoroughly and score through just the top layer (not through the fat makes better crackling, I've heard). Some supermarket porks are already scored but sometimes not enough!
  • Be generous with the oil. I don't measure out, I just pour and generous amount into my hand and rub it all over the skin.
  • Be extra generous with the salt. I used to salt my pork on the baking tray before putting it in the oven, but I put so much salt on it, it can make anything else really salty! Now, I prepare my pork on a plate with salt covering the whole skin and rubbed in. I then transfer it to the baking tray leaving the excess salt out!
  • After preheating the oven on really high, don't turn it down for 15 - 20 mins. I really give it a good chance in the first few moments of cooking so at least I am confident of how it's going to go.
  • Turn the pork when cooking. I try to turn it a few times so all surfaces get a go of the hotter sources.
  • Don't fill the baking tray too much with the roast veg. Anything that will make the roast start to stew will impact on the overall crispiness of the crackling, so if you like using the pan juices and fat from the meat for your roast veg, give the pork it's space!
  • Finally, don't put the crackling on top of the meat to be doused by gravy. I set mine to the side and on top of any juices and sauce!

Sunday, August 28, 2011

Choc and Cheese

Our current Japanese homestay guest loves muffins, so before we start our big health kick, I thought I'd try my hand at some baking. Apart from the odd birthday cake, I'm not really a huge baker. I definitely don't have the perfectionism required for beautiful baked goods, so my attempts are of the rustic variety! 

We were going on a road trip so I decided to bake some savoury broccoli, ham and cheese muffins, a recipe I found on the internet, as well as some sweet cappuccino and white chocolate muffins from my breakfast bible, the Marie Claire Breakfast cookbook. The techniques and ingredients for both sets of muffins were completely different, leading to two contrasting but equally tasty outcomes.

The savoury muffins were delicious. I substituted the plain flour for wholemeal flour in an effort be a bit healthier. It was a really interesting use of broccoli to pack them with goodness! There was a lot more egg in these muffins, and the lightness came from whisking up eggs. They were more akin to frittata than a cake, but that worked really well with the savoury ingredients and made them less heavy and a great breakfast on the road snack.

The sweet muffins were light and fluffy from the buttermilk added in these. The coffee flavour was subtle and balanced the sweetness of the chocolate. There were however, some hitches along the way! The muffins were prepared wrapped in baking paper lined ramekins. Whilst they were moist and tasted great, they were quite a strange shape given some of my inconsistent baking paper cylinders. The white chocolate chips kind of sunk to the bottom of the muffins too! And they certainly didn't look much like the picture.

All in all though, my efforts were pretty good and those tucking in came back for seconds reinforcing that they were actually very tasty!

Sunday, August 21, 2011

Bumper Birthday

Both of my cousin's kids have their birthday in the same month and for a few years now we've made the cake for the youngest whose birthday falls earlier in the month. Last year, however, he declared that he "wanted a different cake" than the very cool (we thought) "4" chocolate cake with orange coloured butter icing, and decoration. Turns out he is not a fan of anything but chocolate cake that looks like chocolate (and not fluorescent orange!) This year we ended up baking a cake for both of them for their joint birthday party.

As fortune would have it, I just received a copy of Fiona Cairns' Bake & Decorate from a competition run by Chris Dreyfus' Silver and Claret  and the Family Chocolate Cake looked perfect for the chocolate lover birthday boys. It's a very succulent cake which I have now perfected after making the recipe a few times for enough mixture for the two cakes - a figure eight and a figure five.

My hubbie loves decorating cakes and took on the icing of the racing track figure eight with a cocoa butter cream, whilst I stuck with a chocolate ganache (from the chocolate celebration cake, also in Bake & Decorate) for the plainer 5. It was the first time I'd made ganache frosting, but it was quite easy to work with, as I just let it drip down the sides, and spent more time wiping around the cake!

The cakes were a great success and both birthday boys were very excited and impressed, and they both tasted fantastic!

Sunday, August 14, 2011

It's the Bombe!

My Strawberry Bombe Alaska
To celebrate the end of Series 3 of MasterChef, I thought I'd go a bit outside my comfort zone, and add a bit of MasterChef pressure to my kitchen! I thought I'd try a version on Bombe Alaska. Now the MasterChef recipe looks fantastic, with coconut ice cream, cherry sorbet and a 10 egg yolk sponge, which is really a bit much for my busy weekend, so I searched around for a slightly easier version. It turned out pretty hard to find a less complex version where you actually make all the components. If I am going to the trouble of using a sugar thermometer and a blow torch on my creation, I at least want to know I've put the effort into the easy parts myself! Here is my Strawberry Bombe Alaska:

The Ice Cream and Sponge should be made in advance so they have time to cool (and freeze into the bombe shape in the case of the ice cream) so actually, this is quite a good dessert for a dinner party as it looks impressive and can be prepared before the guests have arrived! The gadgets I use are an ice cream maker, food processor, sugar thermometer and a blow torch. It is much easier with these, but I'm sure possible without (although a sugar thermometer is crucial for getting the Italian meringue right.)


Strawberry Ice Cream
Custard
1 cup of milk
1 cup of cream
4 egg yolks
½ cup of caster sugar

Strawberry puree
500g strawberries
1/3 cup of caster sugar


Sponge Base
62g butter
Dash of vanilla essence
¼ cup caster sugar
1 egg
¾ cup self raising flour 
1/6 cup of milk
1 tbsp brandy

Italian Meringue
4 egg whites
1 ½ cups caster sugar

Make the Ice Cream (I did this the night before)
Heat the milk and the cream until almost boiling;
Meanwhile, whisk the egg yolks and sugar until light and ribbony;
Whisk the milk mixture into the egg yolks, then quickly put back on the stove in a clean saucepan;
Stir until thick and coats the back of the spoon;
Cool the custard (to prevent a skin forming on the top, rest some cling film over the surface of the custard).
Meanwhile, whizz up the hulled strawberries in a food processor, then pass through a sieve to remove the seeds;
Heat in a pan with 1/3 cup caster sugar and reduce till you have around 1 cup of puree;
Cool the puree.

Make the Sponge
While you're waiting for the ice cream components to cool, start on the sponge base. Preheat the oven to 180º; 
Grease and line a 20 cm round baking tin;
In the food processor, beat butter and vanilla essence until light in colour, add the sugar and beat till creamy;
Add one egg and beat till combined;
Add 1/2 of the flour and beat, then 1/2 the milk and beat till combined; 
Add the remainder of the flour, beat and then add the remainder of the milk and beat till combined and has formed a smooth mixture;
Scrape the mixture in the prepared baking tin and bake in the preheated oven until lightly golden (about 15 min in my oven) and a skewer comes out clean;
Remove from oven, and turn out onto a wire rack to cool.

Churn and freeze the ice cream
When the ice cream mixtures (custard and puree) are cold, mix them together well and churn as per your ice cream maker's instructions.

Line a pudding basin (just under 20 cm in diametre and 1 litre capacity) with cling film. When the ice cream has churned, scoop the ice cream into the pudding basin and place in the freezer to freeze completely.

Italian Meringue

I used the recipe from the MasterChef magazine, also found HERE which is outlined below.

"Combine sugar and 60ml (1/4 cup) water in a saucepan over low–medium heat and stir until sugar dissolves. Brush down the side of the pan with a wet pastry brush to prevent sugar crystals forming. Increase heat to medium and cook, without stirring, for 4 minutes or until syrup reaches 115C on a sugar thermometer.

Using an electric mixer, whisk egg whites and a pinch of salt to soft peaks. With mixer on low speed, gradually add syrup in a slow, steady stream, then increase speed to high and whisk for 10 minutes or until stiff and glossy." (taste.com.au)


Assemble the Bombe Alaska


When the Italian Meringue is stiff and glossy, it is time to assemble the bombe. Lay the sponge on a serving dish and sprinkle a tablespoon of brandy (or liqueur of your choice) over it to moisten. Turn out the ice cream out on to the sponge round. Trim the sponge if it's a little bigger than the ice cream pudding basin shape. Quickly cover the ice cream in Italian Meringue and then create your pattern with the spatula or a knife. Quickly caramelise sections all over with a blow torch.
Serve and Enjoy!


Related Posts Plugin for WordPress, Blogger...