Saturday, December 31, 2011

The Outtakes 2011!


Of course I think of myself as pretty good at cooking - enough to blow my own trumpet about something amazing that I have prepared or eaten on a weekly basis. However, I am not infallible and there have been some shockers that don't make it to the pages of M(i)sCh(i)ef! Normally they are blocked from my memory, but here are a few I choose to remember and share for a giggle as I reflect on my year of cooking and blogging!

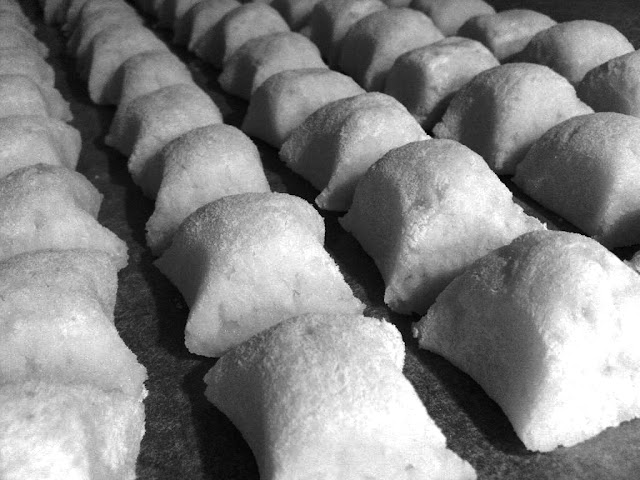
Gnocchi - Pre freezer disaster!
Gnocchi - after making a huge batch of gnocchi on my first attempt, I read that it was good for freezing and you could even cook it from frozen. I must have added just a few too many to the boiling water, so that by the time they were cooked, all the gnocchi had disintegrated into a gooey mess.

Profiteroles - away for the weekend, I thought that profiteroles would be a quick easy dessert. I am pretty confident with my choux pastry, but with out kitchen scales, I had to wing the quantities adding a bit of flour here and there to get the right consistency of batter. Unfortunately, that's not exactly how choux pastry is made so they didn't puff up, but were flat biscuit-like rings! Next time I've promised my friends proper profiteroles, so I'd better live up to that when I have my trust scales!

The Successful Strawberry Sorbet
Ice cream - sometimes I can get quite impatient in the kitchen, and a little cocky! I made custard for ice cream the other day and was too impatient to follow the recipe thinking I knew better and ended up with scrambled eggs! I ended up making strawberry sorbet instead!

Crab omelette - after a long day of work, working out etc. I sometimes feel a bit exahusted. Last week I thought I'd make a quick Asian omelette. Just as well I checked the recipe a few times only to realise that I had mistaken tablespoons for teaspoons and put in quite a lot more soy sauce than I was meant making a horrible brown coloured egg mixture!

Kahlua Truffles - Making my work colleagues a Christmas gift was supposed to be easy - a recipe I've done over and over since I was little - I thought I'd go fancy and get Lindt 70% Cacao Chocolate to be extra special, only to find that the higher the percentage, the more liquid is required to prevent it from seizing. The mixture ended up like a yucky sludge! My successful attempt used only 40% chocolate.

So tonight, I'll be raising a glass to toast the successes (and failures) of 2011! Here's to a fab 2012!

Monday, December 26, 2011

Edible Gifts - Kahlua Truffles


Kahlua Truffles

One of the benefits of working with a food blogger is that my colleagues sometimes get to taste the fruits of each weeks labour. This Christmas, I thought I would make something just for them. I decided to try out my own variation of rum truffles that I used to make as a kid, instead of rum, using Kahlua. The truffles are super rich so a few are plenty and one bite keeps your chocolate intake up over the holidays! They aren't exclusively a Christmas chocolate. In the past I've made them for Valentine's Day gifts and filled Easter Eggs with them, so they're pretty versatile - for any day of the year where Chocolate is an appropriate gift (read, any day of the year!) I chose a festive presentation and gave everyone a little box decorated in Christmassy style!

I learnt (the hard way) that a lower grade percentage of chocolate is better so used a 40% cacao, not higher (for the successful attempt!)

Kahlua Truffles
This makes about 70 truffles

600g dark chocolate
85g butter
6 egg yolks
6 teaspoons of Kahlua
Cocoa Powder (for decorating)
Truffle cases

  • Melt the chocolate and butter in a double boiler until smooth;
  • Allow the chocolate mixture to cool slightly
  • Gradually add in one egg yolk at a time whisking as you go blending in the mixture so it's smooth and silky;
  • After adding in the egg yolks, add the Kahlua gradually too whisking as you add;
  • Chill in the fridge overnight;
  • Using a melon baller or a small ice cream scoop, scoop out enough mixture to make into little balls;
  • Roll in cocoa powder to lightly cover;
  • Place in truffle cases.


Wednesday, December 21, 2011

Black & White Wednesday - Homemade Gnocchi

I made this Gnocchi a few months ago and chose it for posting in this weeks Black and White Wednesday run by Susan from the Well Seasoned Cook

Home made Gnocchi

Monday, December 19, 2011

Mont Blanc Meringue Nests


Chestnuts seem to be traditional in the UK more than in Australia around Christmas. The smells of hot chestnut sellers in the street are a common scent on the main street of Edinburgh, and for a break whilst Christmas shopping it's a treat to warm your hands on a bag of the smoky, soft nuts.

© Catherine Kennedy -
Beneath the Water
In Australia, "chestnuts roasting on an open fire" is just a line of a Nat King Cole carol, somewhat inappropriate for a scorching summer day, so the Aussies need a different way to enjoy chestnuts in December.

For this Sweet Adventure Blog Hop I thought I'd suggest a way....

...Mont Blanc Meringue Nests.

Supposedly named as the dish resembles the highest European mountain, Mont Blanc when referring to dessert, includes a chestnut purée and is usually topped with whipped cream (I substituted pouring cream in my dish).

The taste of the chestnut cream is very distinctive so when I ran my finger through the cream left on the food processor blades (yes, I still lick the bowl!), childhood memories were reignited of dinner parties round my parents table. The flavour is hard to explain, but a fabulous combination the nutty flavour with a hint of sweetness and a dash of sherry and it balances the sweetness of the meringue perfectly. The meringue nests are a perfect end to a December festive meal, generous and elegant but light at the same time.

Mont Blanc Meringue Nests (adapted from the recipe in an old favourite: Reader's Digest, the Cookery Year)

Serves 12

Meringue nests
6 egg whites
330g caster sugar
2 pinches cream of tartar (anyone wondering what this is and why you use it, here is a great post I found from A Pie for a Pie)

Chestnut cream
150g butter
100g caster sugar
425ml can of chestnut purée
35ml dry sherry

To serve
Pouring cream
Raspberries

Meringue nests

  • Preheat the oven to 100°
  • Spray oil and line 2 large baking trays with baking paper. Spray the top of the paper lightly too!
  • Beat the egg whites until they form stiff peaks. 
  • Gradually add the sugar and cream of tartar. 
  • Beat well till all the sugar has been completely combined and the mixture is smooth and silky and holds it's shape.
  • Take a large spoonful of mixture and use the back of the spoon to shape into a round base on the baking tray. You need to fit 6 rounds (about 10cm diameter)
  • Repeat for all 12. You should still have plenty mixture left.
  • Fill a piping bag with the remainder (using the large star nozzle).
  • Pipe a ring of rosettes around the circumference of the meringue circles making a nest.
  • Place trays in the oven and bake for 2 hours. Then turn off the oven and leave the meringues in there till the oven is cool, preferably over night.
  • When I made mine, I sneakily (and v. carefully) moved them all after 2 hours so I knew they hadn't stuck to the baking paper before I left them overnight.
  • Store in an air tight container until you serve them, or they might get soggy!


Chestnut cream

  • Cream the butter and sugar together until light and fluffy. 
  • Gradually add a spoonful of chestnut puree and beat in well. Be careful not to add too much at once as the mixture might curdle.
  • Keep beating until all the chestnut puree is combined.
  • Next, add the sherry gradually, one teaspoon at a time, continuing to beat well to incorporate each spoonful. (The process of adding the puree and sherry is much easier in a food processor as I leave the motor running and drop the spoonfuls down the shoot!)
  • You can either leave the cream aside or assemble the meringue nests straight away. Just don't assemble the meringue nests until you are ready to serve.


Assembly

  • Spoon the chestnut cream into the meringue nest centre.
  • Decorate the plate with raspberries and a drizzle of cream.
  • Serve with the pouring cream on the side for those who want more!

Saturday, December 10, 2011

Festive Stuffed Chicken Thigh - Easy Christmas Dinner!

I like to have my Christmas Cake and eat it too! What I really mean is that I don't like to limit my Christmas spread just to Turkey or Ham or Prawns or..... The trouble with cooking for so many people and wanting such a variety is the oven space. Inspired by Christmas recipes of stuffed, rolled birds, I designed an easy festive stuffed Chicken Thigh that we're going to serve as part of a banquet for the family on Christmas Day. The thigh is much more moist than the breast, which is why I chose that part of the chook, and is a small enough to be individual and big enough to roll and with some tasty stuffing inside! We also cooked it on the BBQ meaning that the precious oven space will be freed up for bigger (not necessarily better) things!

Chicken Thighs on the BBQ
Festive Stuffed Chicken Thighs

Ingredients

Chicken Thighs - 1 per person
Bunch of Sage
Prosciutto - 1 slice per thigh

Stuffing (this stuffed 8 Chicken Thighs)
350g. sausage meat
1 med onion (or 2 spring onions), finely diced
4 sage leaves, chopped
Salt & Pepper

Sauce
Craisins
1 cup Red wine
2 tbs Plain Flour
2 tbs Redcurrant Jelly

The raw unrolled Festive Stuffed Chicken Thigh

  • Prepare the stuffing first - mix all the ingredients together in a bowl. Divide into equal portions (as many as you have chicken thighs);
  • Spread the Chicken Thighs out flat and lay them on a board;
  • Cover the Thighs with cling wrap;
  • With a rolling pin, or another hard implement (meat tenderiser would do too!) whack the Chicken Thighs till they are flat;
  • Lay a slice of prosciutto on a piece of foil (enough to wrap the whole thigh)
  • Place a sage leaf on the prosciutto;
  • Lay the flat chicken thigh along the proscuitto on top of the sage
  • Place a ball of stuffing on the thigh and roll it tightly
  • Wrap the foil tightly round the rolled meat;
  • Repeat for the other Chicken Thighs;
  • Leave to rest in the fridge;
  • Meanwhile, soak the craisins in the Red wine for the Sauce
  • When ready to cook, heat the BBQ;
  • Remove the thighs from the foil and carefully place on the BBQ;
  • BBQ turning often until the roll is cooked through.
  • While the Thighs are cooking, prepare the sauce by adding the craisins and wine to a small saucepan;
  • Add the redcurrant jelly and bring to the boil;
  • Add a dash or red wine to the flour and stir to make a paste. Add the flour to the sauce to thicken it and make it glossy.


Wednesday, December 7, 2011

Black & White Wednesday - Kaffir Lime Pannacotta with Finger Lime Syrup

I found this picture when looking for my next photo for posting in Black and White Wednesday run by Susan from the Well Seasoned Cook

The pannacotta lended itself to black and white with the black flecks of vanilla bean contrasting with the white of the smooth pannacotta.

Kaffir Lime Pannacotta with Finger Lime Syrup

Sunday, December 4, 2011

If Music be the Food of Love...


Chocolate Gunge

...We'd better feed the musicians!

In my offline life I play the violin in the Eastern Sydney Chamber Orchestra. Every concert the orchestra members pitch in a contribution to the afternoon tea for the audience to look forward to during the first half and to keep the sugar rush and adrenalin of the players high to see them through till the end of the concert!

This time I decided to bake an old favourite family recipe originally passed to us from a great family friend. It is a simple but amazing moreish kid friendly snack called Chocolate Gunge! Gooey and chocolatey, it attracted audience and orchestra members young and old!

When I say "recipe" I mean I kinda remember from my childhood what we put in and how we made it, so to help me commit it to memory for next time and to give a quick, easy and cheap ($7.36 for the whole lot) winner dish for the next kids party, or orchestra afternoon tea, I am sharing it here!

Chocolate Gunge

250g butter ($1.55)
395g can of condensed milk - ($1.79)
Cocoa powder (in the pantry)
250g scotch fingers - ($0.95)
250g milk arrowroot - ($1.09)
375g Milk chocolate - ($1.92)


  • Melt butter in a large saucepan. Remove from heat;
  • Add condensed milk and coca powder and stir well;
  • Crush the biscuits with a rolling pin or in a food processor till broken into small (approx 1cm pieces) but not crumbs;
  • Add biscuits to cocoa mixture and mix well;
  • Turn out into a rectangular baking tray;
  • Chill;
  • Meanwhile, melt the milk chocolate in a double boiler - a heat proof bowl sitting on top of a saucepan of water (but not touching the water) on the boil;
  • When biscuits are chilled, pour over the melted chocolate;
  • Spread the chocolate evenly over the biscuit and then make a swirly pattern using a fork;
  • Return to the fridge overnight or till the chocolate is solid;
  • Slice into 2cm square pieces and serve.


Don't expect it to last long!
Related Posts Plugin for WordPress, Blogger...